Build and edit scenes with AtlasChisel
Choose the right inputs, render a blockout, restyle it, and edit selected regions.
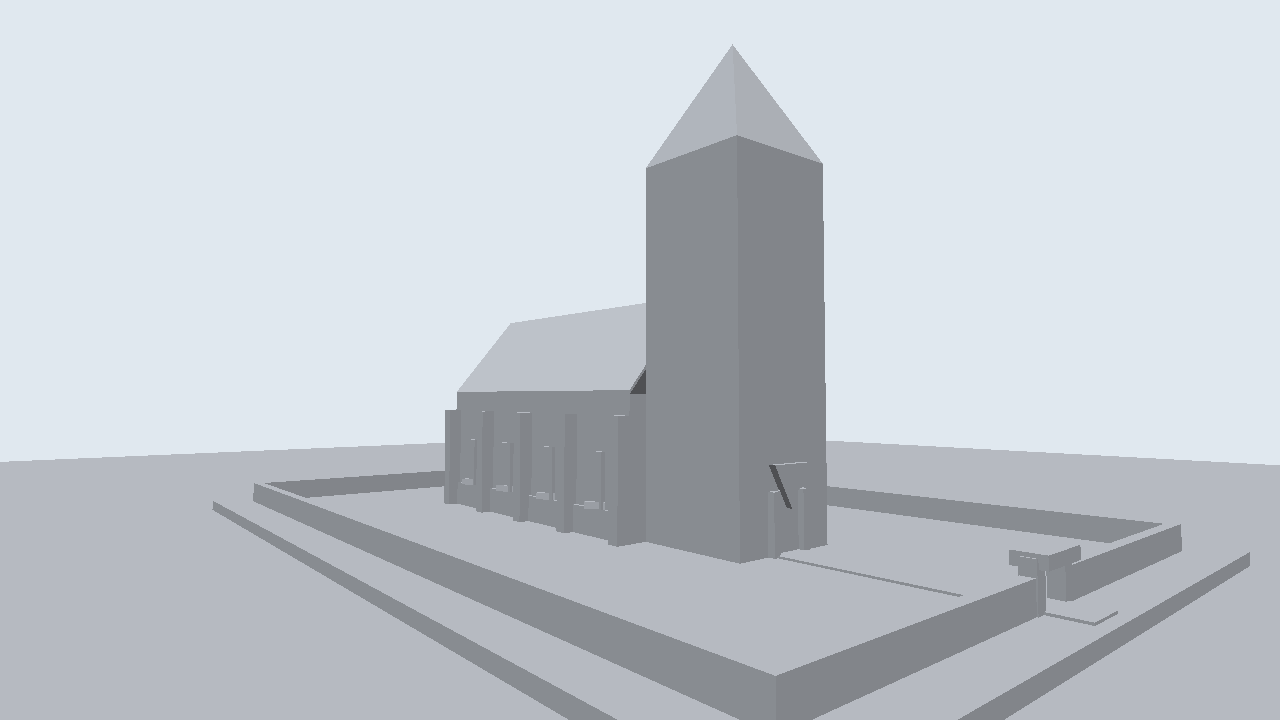
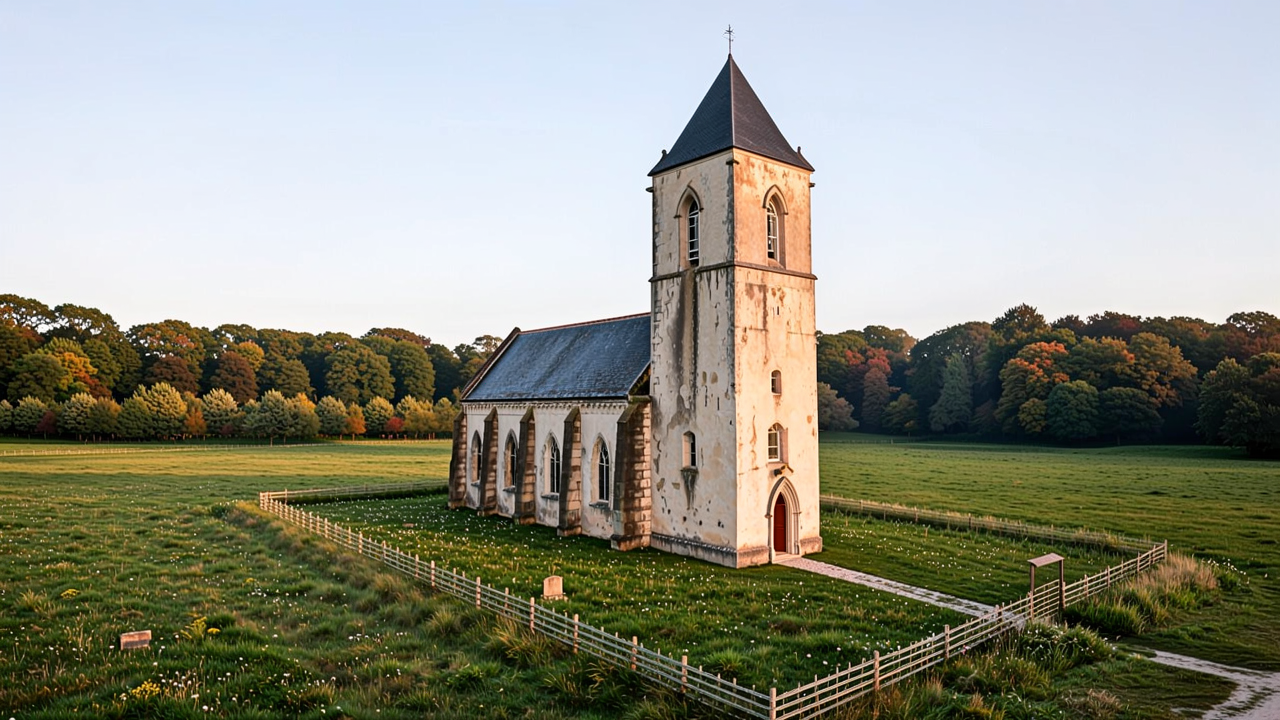
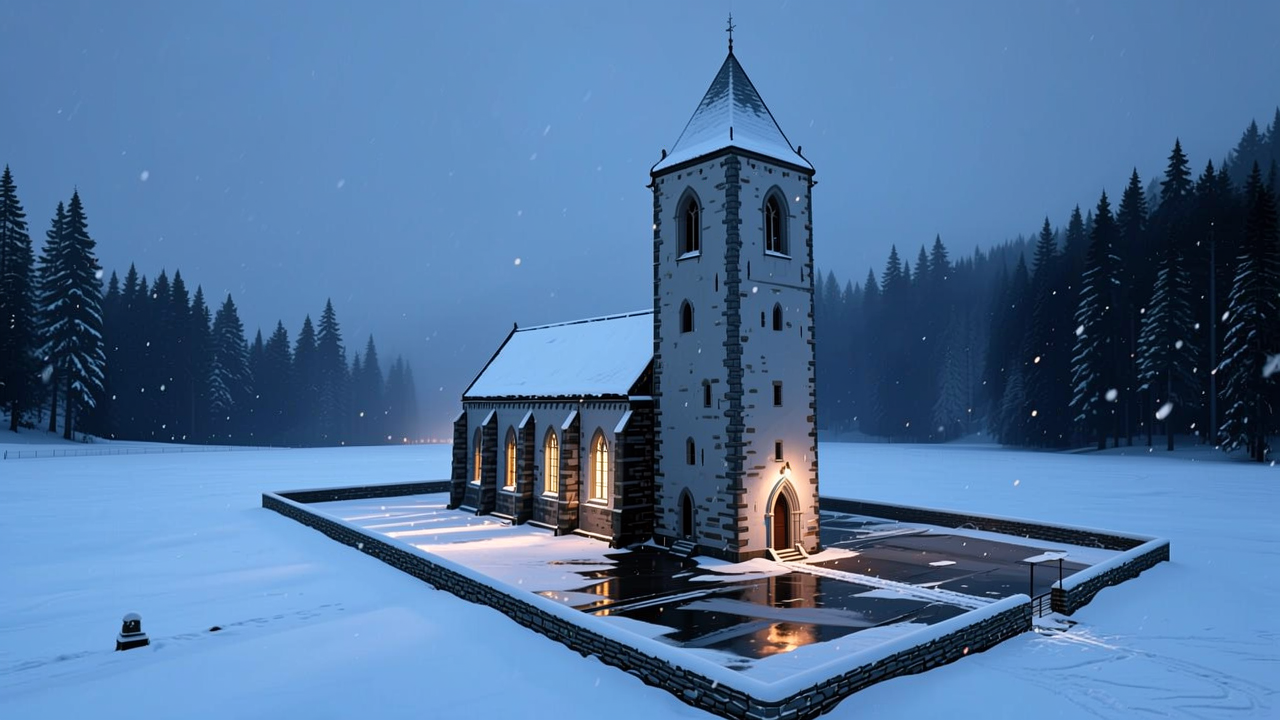
Use atlasChisel to turn a 3D layout into images or regenerate selected parts
of a scene. Start with a Gothic chapel blockout, render a golden-hour scene, then
turn it into a snowy scene at dusk. The tutorial also shows how to remove a
foreground fence. Downloadable geometry, a depth map, a camera, and a keep
mask accompany the examples.
| Blockout | Golden hour | Winter restyle |
|---|---|---|
 |  |  |
The key decision is which parts of the input should survive. Depth guides layout. Known RGB pixels guide appearance. A context photograph tells the model to stay consistent with that photograph, even when the prompt asks for a change.
Choose the task and inputs
| Your goal | Task and inputs |
|---|---|
| Move the camera through an existing photographed or generated scene | Use atlasGenerate with posed RGBD contextFrames and the new targetCameras. |
| Render a blockout or restyle a scene while retaining its layout | Use atlasChisel with depth-only targetFrames and a prompt describing the finished scene. Start with contextFrames: []. |
| Replace or remove something in existing views | Use atlasChisel with an image and keep mask in each targetFrames entry. Add depth only where its geometry should still guide the result. |
An inspiration image, an empty-room render you want to furnish, or the old
appearance you want to replace should not go into contextFrames. Those images
can pull generation toward the very content you want to change. Use the
room's depth to guide the layout and describe the desired appearance in text.
What each frame means
| Field | What to put there | What it controls |
|---|---|---|
targetFrames[i].camera | Camera for the image you want back at position i | Output viewpoint and ordering |
targetFrames[i].depth | Depth rendered or estimated at that camera | Layout at that view |
targetFrames[i].imageAsset | Finished pixels of that same view | Appearance to retain, restricted by its keep mask |
targetFrames[i].maskAsset | White for known pixels, black for regeneration | RGB and depth together, unless a separate depth mask is supplied |
targetFrames[i].depth.maskAsset | White for known depth, black for unknown geometry | Depth independently of the RGB keep mask |
contextFrames | Posed RGB views of this scene whose look you want to retain | Visual consistency across viewpoints |
Send one target frame per image you want back, in output order. A target frame with only its camera is generated from the prompt alone; otherwise each target frame needs depth, an image, or both.
Each target frame requires a camera. For each of depth, imageAsset,
maskAsset, and depth.maskAsset, include that field on every target frame
in the request or omit it from all of them.
depth | imageAsset | maskAsset | Valid request? |
|---|---|---|---|
| All frames | None | None | Yes |
| All frames | All frames | All frames | Yes |
| None | All frames | All frames | Yes |
| All frames | Some frames | Some frames | No |
| Some frames | None | None | No |
Context frames contain only imageAsset and camera.
Before you start
Use Bash with curl, jq, and Python 3. Create a project API key with tasks.create,
operations.read, assets.create, and assets.read; see
Projects and API keys. The
atlasChisel API reference lists every request
field.
Start with one target and returnDepth: false. This gives you a small request
to inspect before adding more views. The examples use a synthetic
chapel blockout. The result images below are actual atlasChisel outputs
from the shown inputs and prompts; results can vary as the model changes.
1. Prepare a depth map and its camera
The blockout contains a bell tower and spire, a nave with buttresses, and a low wall around the churchyard. Download the 3D blockout to inspect it in your 3D editor, or start directly with the pre-rendered depth and camera.
Geometry preview only. The request uses the depth map below, not this RGB render.
Download depth-0.png and camera-0.json:
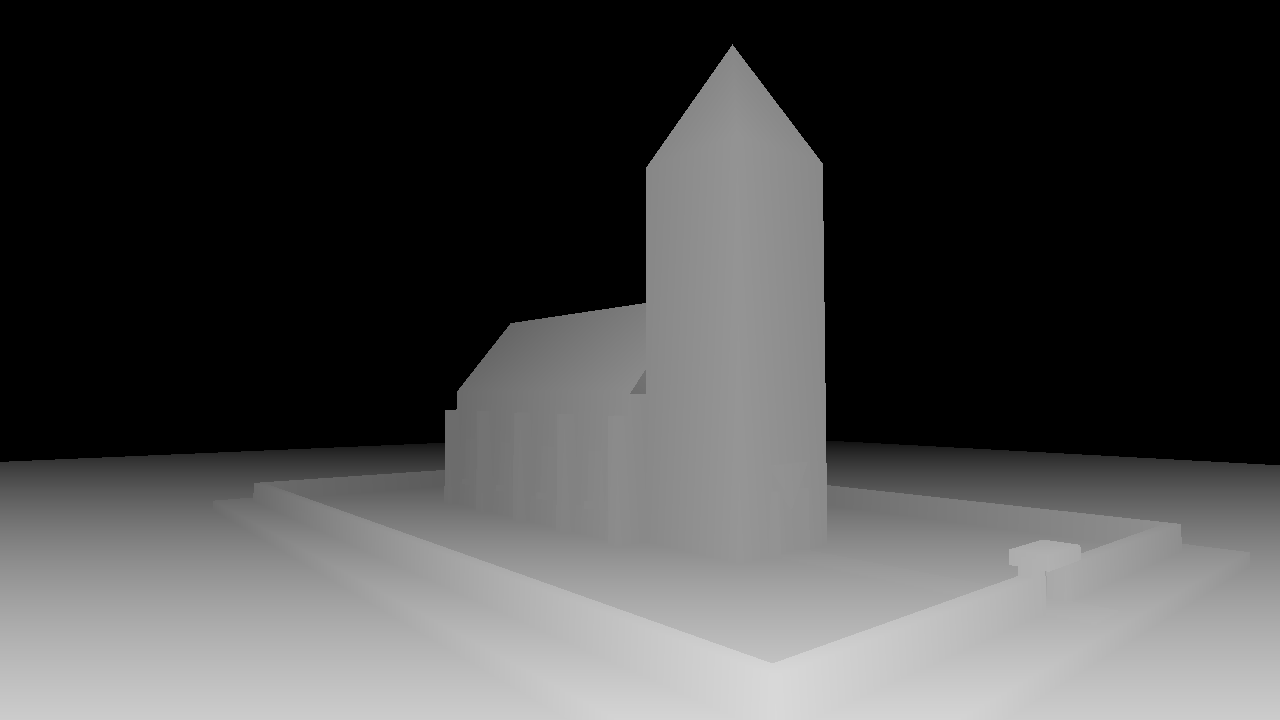 Actual input PNG: brighter surfaces are nearer; black means no surface. Use zMin: 10 and zMax: 150 with this file.
The 1280 × 720 PNG stores inverted log depth with zMin: 10 and
zMax: 150. Camera positions and depth are in metres. The supplied camera
uses the rub convention: local X points right, local Y up, and the viewing
direction is local negative Z. Its quaternion turns it toward the chapel:
For your own blockout, render depth at each target camera. Chisel requires 1280 × 720 depth rasters and target cameras. Depth is planar distance along the camera's optical axis, in the same units as camera positions. A renderer's nonlinear depth buffer or distance along a ray needs conversion first.
Send linear depth as depth.depthAsset with an EXR, or inverted log depth as
depth.logDepthAsset with a PNG and its zMin/zMax. Mark sky as no surface:
0 in a log-depth PNG; 0, NaN, or infinity in a linear EXR. A distant sky dome
is finite geometry and can distort the depth range. See
Encode depth.
For a restyle of a photographed scene, first use
images2PosedRGBD with targetResolution: [1280, 720].
Keep the returned camera and depth together. Build new target frames with
only camera and depth.depthAsset; omit the original RGB and
depth.confidenceAsset. Do not resize a depth raster without updating its
camera intrinsics and image alignment.
2. Upload and build the request
These PNG fixtures fit the inline upload limit of 10 MiB. Define this helper for the depth file and the later image-edit example; use the upload flow in Assets for larger files.
There is no blockout RGB in this request. The depth defines the layout and the prompt describes the materials, light, and intended object. Depth guides generation; it does not guarantee exact geometric reproduction.
The example supplies a finished-scene caption with enhancePrompt: false so
you can inspect the exact text sent to generation. For shorter prompts, leave
enhancePrompt enabled to expand them. Leave modelParameters.numSteps unset
for the model's default, and omit voxelSize for the first run.
3. Submit once and inspect the result
Save a unique idempotency key with the request. Reuse it if you retry this same submission after a network error; use a new key for a changed prompt or input.
Wait for that operation instead of submitting the task again. This loop stops
after a 15-minute polling window; a timeout stops local waiting, not the
server task.
Rerun the loop with the same OPERATION_ID to resume. On HTTP 429 or a
transient server error, follow Errors and retries and resume polling.
Open blockout-result.png. Check the tower silhouette, roof line, buttresses,
and churchyard wall before making a larger request.
Actual output of the blockout request: seed 42, prompt enhancement off, one target, depth output off.
The prompt supplies the materials, vegetation, and lighting. The blockout
supplies the large shapes. Inspect both: generated detail is not proof of
geometric accuracy. Here, the model turned the blockout's low solid wall
into a fence and added window detail that was not modeled. The result has one
frames entry per target, in target order. Keep the request, operation ID,
promptUsed, and returned cameras with the image. See Operations
for waiting, errors, and webhooks.
4. Restyle while keeping the layout
Reuse the depth and cameras, change the caption, and keep the same seed for a useful comparison:
Submit restyle-request.json using step 3 with a new idempotency key and save
its operation separately. Keep blockout-result.png for comparison. Do not add
that old image to contextFrames or to an unmasked targetFrames entry:
its warm-weather appearance and daylight would compete with the winter scene.
Actual restyle output. Only the prompt changed; the depth, camera, seed, and generation settings stayed the same.
For an empty bedroom you want to furnish, make the same choice: use the room's depth and a caption of the furnished room. If you need specific furniture positions or sizes, add that geometry to the blockout and render new depth. To move or remove the chapel or its wall, change the depth or mark its region unknown; changing the prompt alone leaves the old shape in the input.
Edit a selected region
For a local edit, send the generated image in the target frame and mark the region to regenerate black in an 8-bit grayscale PNG. White pixels are the known image. Masks are binary at half intensity, so feathering is not a soft blend.
Download this starter keep mask,
then inspect it over blockout-result.png. Its black region covers the
foreground fence and nearby ground. Expand or repaint it to cover
your actual result, including the fence's shadow.
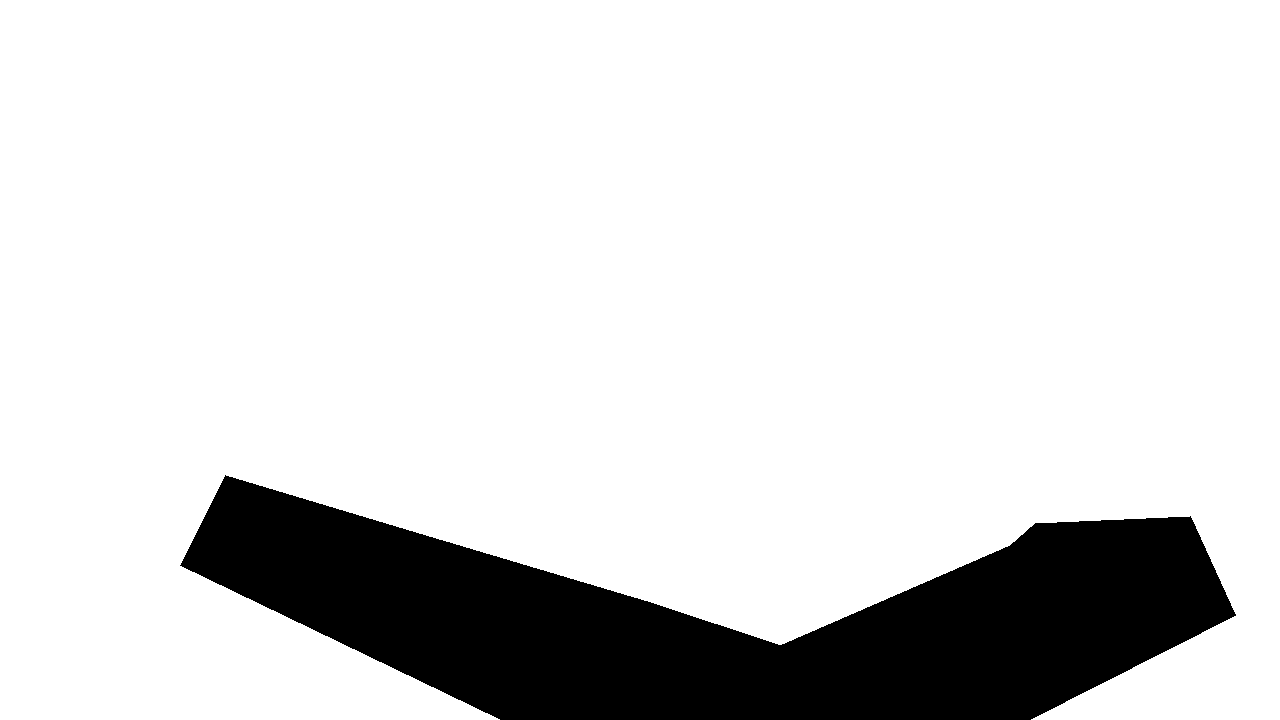 White = keep; black = regenerate. Adjust the region to the generated image before uploading.
Submit edit-request.json with a new idempotency key and wait as in step 3.
This request omits depth so the old boundary-wall geometry does not constrain the
replacement. It also omits voxelSize, which needs depth to operate on.
With enhancePrompt: true, an edit instruction is interpreted against the
target frames' images and rewritten as a caption of the result. With enhancement off,
write a finished-scene caption, for example: "A Gothic chapel in a
wildflower meadow, with uninterrupted grass across the foreground."
If the object becomes another object instead of disappearing, inspect the mask before adding more prompt wording. Include the whole object, its contact shadow, and visible reflections. Increase the black region when remnants outside it still suggest the object. For multiview edits, mask it in every affected view; see Prepare inputs locally.
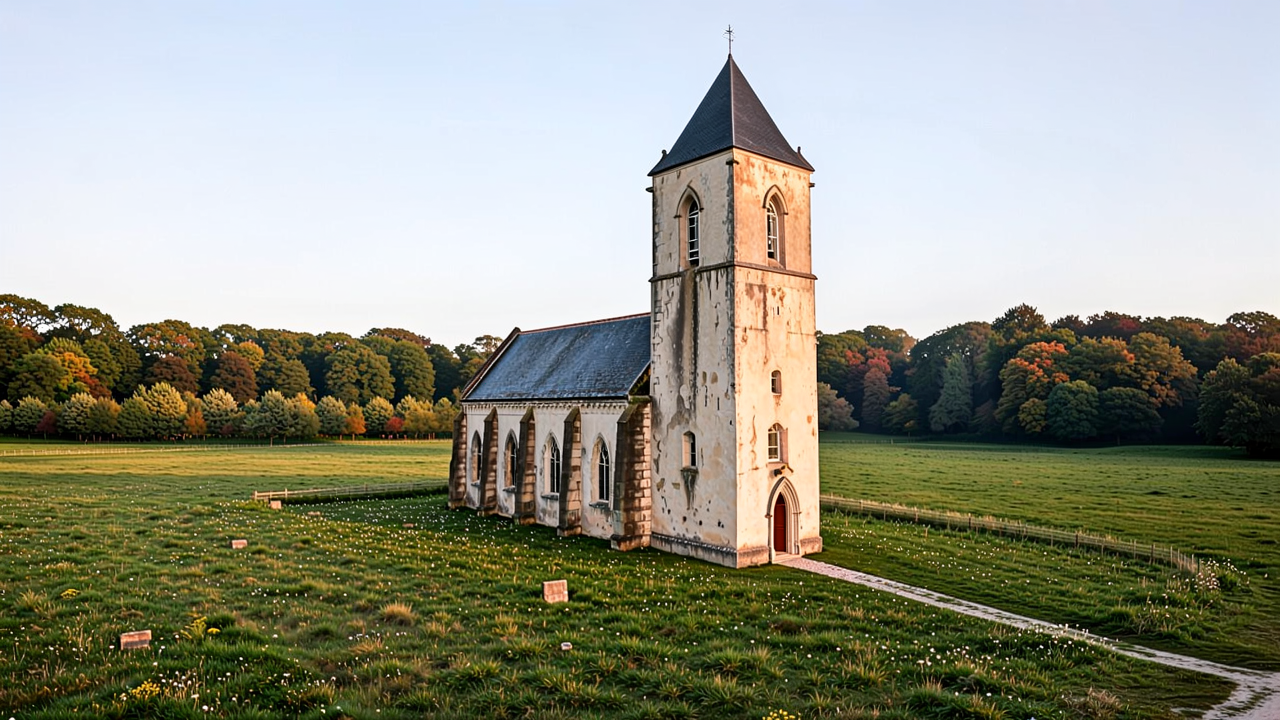 Actual masked-edit output from the golden-hour result and the supplied mask. Inspect the regenerated region and its boundary before accepting an edit.
Keep geometry while changing color or material
When the shape should stay, add depth and a separate all-white
depth.maskAsset to every target frame. The outer maskAsset then controls
only the RGB pixels; the depth mask controls the geometry independently.
For object removal, leave the old object's depth unknown too. A full white
depth mask would retain the shape you want to remove.
depth.confidenceAsset is not a depth keep mask and is rejected by
atlasChisel. Use depth.maskAsset. See
Camera and depth requirements
for the complete frame combinations.
Troubleshooting
| Symptom | Check first |
|---|---|
| The scene keeps its old look | Remove pre-edit RGB from contextFrames and from target-frame regions you want to restyle. |
| A blockout render appears in the result | Use blockout depth without its unfinished RGB. |
| An object refuses to disappear | Remove or mask its old depth; expand the black image mask over shadows, reflections, and edges. |
| The scene looks flat or depth is distorted | Check planar versus ray/nonlinear depth, log-depth bounds, sky values, camera intrinsics, and EXR row orientation. |
| The request is rejected | Check 1280 × 720 cameras, consistent media on every target frame, and absence of depth.confidenceAsset. |
| A large request fails after submission | Check the rollout budget. |
| A one-view request with depth output is rejected | Set returnDepth: false, or supply at least two translated targets. |
For more options, see Depth-guided generation, Cameras and posed images, and the atlasChisel API reference.