Build a scene from images
Pose your images, generate views around the scene, and check them before a video or splats.
A video and a splat reconstruction start the same way. Pose the images you have, generate a small set of views that shows the scene from all around, and check those views before the longer step. The longer step costs more and builds on what the views show, so this is the place to look at the scene and change direction.
Then continue with Make a video or Make splats.
The commands use the CLI. The same requests work through the API and the TypeScript client. A coding agent with the World Labs skills follows these steps for you.
1. Pose the images
Upload each image and run images2PosedRGBD. Set
targetResolution to the size you will generate at, so the image, its depth,
and every later view share one grid.
Each returned frame is an image with a camera and a depth map. Submit photos of one real place together, so their cameras share one world. See How to use Atlas for combining images of different places.
2. Find the main part of the scene
Use the depth map to learn the scene before placing cameras: how far away things are, where the floor is, and where there is open space. Choose the object or area the result is about. The views in the next step go around it. Cameras and posed images covers the camera and depth conventions.
3. Generate views around it
Send one atlasGenerate request with the posed frames as
contextFrames, 6 to 12 new cameras as targetCameras, and returnDepth set
to true. Each returned view then has depth and can be used in the next step.
Where the cameras go depends on the scene. As a starting point:
- Spread the cameras around the main part of the scene, each looking at it, at about the height of the original camera.
- Keep every camera in space the posed images show as empty. A camera inside an object or behind a wall produces large invented shapes in front of the lens.
- Give each camera its own position. A request whose cameras all share one position cannot return depth.
- Let neighboring views overlap.
- Generate the views in one request. Atlas then decides the unseen parts of the scene once, for all of them.
From a single image, a camera can turn about half the field of view, or move about a third of the typical depth, and still show mostly what the image showed. Beyond that, Atlas invents what the view shows. These views are where that happens, in a request that takes under a minute.
4. Check the views
Look at every view. Objects should keep their position, shape, and appearance
from one view to the next. Remove a view that disagrees with the others. To
replace it or to cover a gap, send another request with the good views added
to contextFrames.
When someone else asked for the result, show them the views now.
Example
One image of a potter's studio, posed at 1280 × 720, and seven views on a circle around the work table. The cameras sit every 45° at the original camera's height and aim at the table top. The request took 23 seconds.
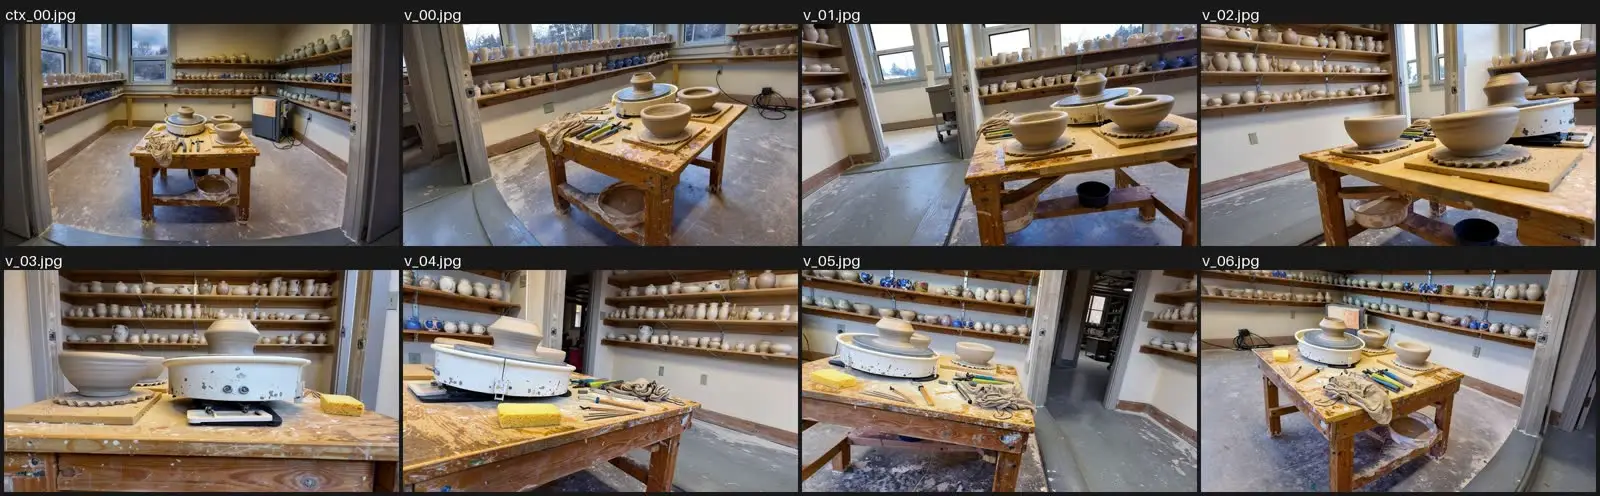 The source image (top left) and seven generated views. The far side of the wheel, the wall behind the original camera, and the doorways are invented.